An Easier Way to Create Maps & Itineraries
- Tools for Planning Long Trips: Where to Begin
- Tools to Create Maps & Itineraries
- An Easier Way to Create Maps & Itineraries
- An Even Easier Way to Create Maps & Itineraries
- Tools and Tips on Bookings
- Tools and Tips for Air Travel
- What travel programs should you join?
- Tools to record your trip steps
- Tools to Reflect on Your Trips
- What to do with Fido
- AN EVEN EASIER WAY TO CREATE MAPS & ITINERARIES – TAKE 2
In this post, I will show you an easier way to create places on maps & itineraries using Scout Explore. Instead of using Google Maps with other tools, Scout Explore can help with itinerary creation. Let’s walk through how to use Scout Explore to create an itinerary of places with my upcoming trip. We are going to Italy and Croatia. So, let’s see how well this works.
- The first time you use Scout Explore, you’ll need to create an account.
- Second, you create your trip. You will enter a city and the dates of your trip. For me, we’re going to many cities, so I put in the first one we’re going to: Palermo, PA, Italy. I then change the name of the default trip to “Italy & Croatia Trip.”
- Once you have the trip defined, you can create sections, which are then referred to as lists. Default lists include Attractions, Accommodations and Food. Lists are like layers in Google Places. Each item in a list will have that list’s color for the map marker.
- Because I also want to see things that are Transportation related, like train stations, airports, etc., I create a section called Transportation.

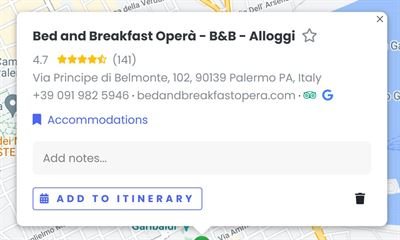
- Next, for each place you want on your itinerary, you add it to a list. So, for example, if I look up where we’re planning to stay the first night of this trip, a B&B called Opera in Palermo, Sicily, I can add that place to my list of Accommodations.
When I search in the map on the right panel on the map, I validate that the address in the results matches the address of my booked accommodation. If it does, then I click the yellow icon to add it to a list.
![]()
And then I choose which list to add it to:
- Finally, I will add that list item to my itinerary.
![]()
- Note: When you add it to the Accommodation list, the website displays a modal window (shown above) that lets you add it to your itinerary here, but the problem is, it only adds it to one night. So, instead of adding it from that modal window, I close that window and drag the item from the list panel to the first night we’ll be there in the itinerary panel. (You may have to click on the itinerary view to get that panel to display.) Below, I have dragged the Opera B&B item over to Monday, April 17th:

After dragging it, I get the above modal that asks me to fill in the start and end dates.
- Note: When you add it to the Accommodation list, the website displays a modal window (shown above) that lets you add it to your itinerary here, but the problem is, it only adds it to one night. So, instead of adding it from that modal window, I close that window and drag the item from the list panel to the first night we’ll be there in the itinerary panel. (You may have to click on the itinerary view to get that panel to display.) Below, I have dragged the Opera B&B item over to Monday, April 17th:
Now, the one downside of using Scout Explore is that it doesn’t have the ability to create a route for all the places on your map. What you can do for directions is click on the place on your map, click the Google Maps icon, and that will give you the directions from your current location to the next place. So, it’s useful while you’re enroute via a mobile device. But if you want to export the map so you can import it to a navigator, you can’t do that — at least not yet. Let’s all ask for that feature by using the Feedback link on Scout Explore.
I hope you find that this is an easier way to create maps and itineraries.


Comments are closed.